Greenhouse Starter Kit
Kenya has many greenhouse suppliers, each with their own qualities. Amiran is one of Kenya’s largest greenhouse suppliers. They have been promoting greenhouse farming technology and offering trainings for over thirty years. An innovative aspect of Amiran is their starter kit. These kits come with all the necessary materials to construct a greenhouse, including seeds and fertilizers. The total costs for this kit correspond to the purchase of all the separate parts. Now other suppliers have introduced starter kits as well, each offering different models. For the new greenhouse we enquired about these starter kits with different suppliers.
Selecting a Suitable Greenhouse
When choosing a suitable greenhouse, certain requirements need to be taken into consideration. Firstly, it is important to know the climatic conditions. Weather conditions for example determine the type of shape and material needed. The greenhouse that was built last year is not suitable for this region. The design has a tunnel shape, which makes the greenhouse too low to grow tomatoes. Also, the greenhouse is completely sealed with plastic. There is no ventilation so crops overheat quickly. In the first weeks of our internship we visited several greenhouses in the region, successful and failed examples, to get an idea of the different options. The most suitable design for this region is one where the cladding is a net, to ensure good ventilation but keeping out the insects and other animals. Also, due to the vertical sides and height this creates, it is possible to cultivate tomatoes. Next to the climatic conditions, it is important to consider the security. There is always a chance of theft, even within the University grounds. This means we need a greenhouse that is easily lockable. Furthermore, to be able to install a rainwater harvesting system, the starter kit must include gutters and the greenhouse frame must have a support system to attach these gutters.
With these requirements in mind, we enquired with different suppliers and requested quotations for a greenhouse of 8x15 meters. Hortipro was the only supplier that met our requirements and budget. This greenhouse also included a front porch, which was an advantage as this porch can be used as safety zone and storage.
The Water Harvesting System
The water supply system is a critical factor in the establishment of a well-functioning greenhouse. All the water needs to be supplied manually, as the roof shelters the crops from the rain. At the University, the greenhouses are connected to the pipeline system that directs water from the river to the University’s water treatment plant. This means a constant supply of water can be ensured, as the river flows throughout the year. However, when the water supply system breaks down, which happens quite often due to problems with the pumps and the long time it takes to repair the system, the harvest fails. For this reason, we designed and constructed an additional water harvesting system, to ensure a constant water supply for the greenhouse.
With a demand and wishes list, three different options were evaluated: rainwater harvesting, harvesting from a river or pond and a well. Rainwater harvesting was chosen as the optimal water supply system, since the rooftops to collect it from are already there, the amount of rainfall is sufficient and rainwater is a free and sustainable water source.
Having chosen a rainwater harvesting system, the total amount of water storage needed to be calculated to ensure a stable water supply even in times of drought. This was done by considering the rainfall depth and the occurrence and length of the periods of drought. The periods of drought cannot be found in the average statistics, as the duration and the months of the drought fluctuate, which means the average data do not give a good impression of the occurrence of dry seasons. To assess this, we used data from a farmer who has been collecting rainfall data for the last 8 years. It was concluded that a water supply system with a storage of 15000 liters should be able to provide water for two months.
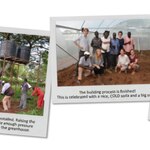
The construction itself took three days. First the gutters were attached to the greenhouse and the foundation for the tanks was made. Three 5.000 liter tanks were placed, connected to the gutters. To filter the rainwater a first flush system was installed and a large debris filter was inserted in the gutters. A manual pump was bought to pump the collected rainwater from the 5.000 liter tanks up to the upper tanks. Those two upper tanks, both 500 liters, were placed on an iron stand of 2 meters height. This results in enough gravitational water pressure to water two greenhouses.
Purchasing the Greenhouse
With the quotation, Hortipro added a list of items to be supplied. The starter kit included all the agro-chemicals and some farming equipment. In consultation with Mr. Achuti we agreed to leave these items out, since the University already had the farming equipment and the agro-chemicals were less expensive in the local store. Under supervision of Mr. Achuti the order was placed and the money was transferred to Hortipro. The greenhouse was delivered within 3 days. The construction could be started!
The Construction Process
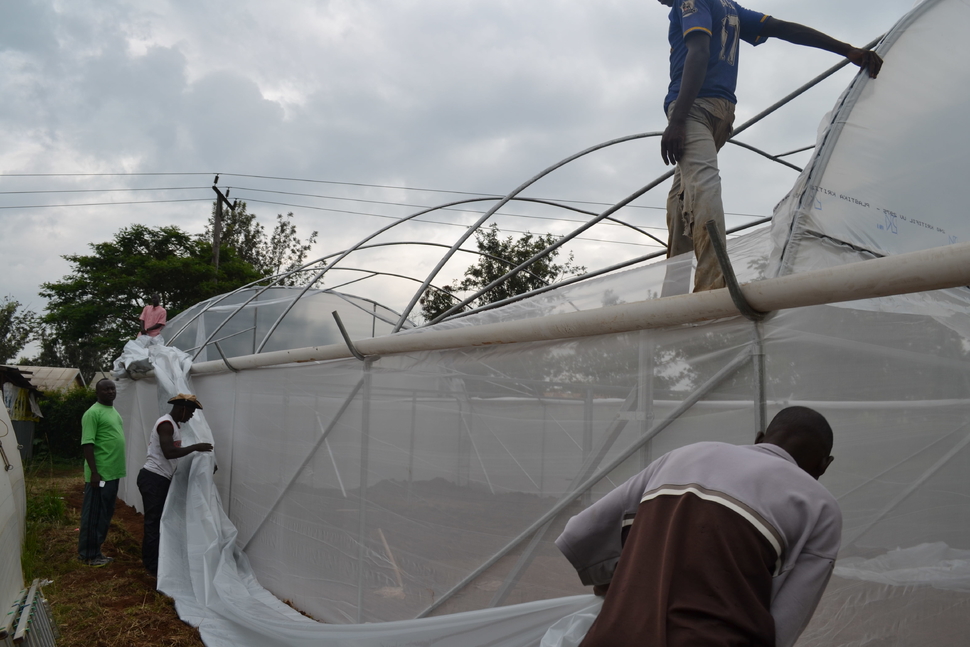
During the phase of constructing the greenhouse Mr. Achuti wanted to be present to supervise the project. He was on a tight schedule so we only had five days to construct the greenhouse. This meant good organisation and hard work were crucial. At times, we were forced to make some rash decisions which caused some stress. However, one of the advantages of buying the starter kit was that Hortipro also sent a technician to guide the construction process. His knowledge and experience were of major value in this phase. Next to this, Mr. Achuti had arranged eight local farmers to help with the construction. These farmers came from different farming backgrounds. For a small fee, they were keen on getting this hands-on experience.
Watch the video of the construction of the greenhouse here:
Day 1: Monday
The construction of the greenhouse started on a Monday. On this day, the following
activities were conducted:
• Purchasing water tanks at the local store. With the technician being around, he could
help us with the construction of the foundation for these water tanks.
• Preparing the site:
Removing bushes, grass, rocks, and other obsticles
Measuring the site for the greenhouse.
• Soil preparation.
Day 2: Tuesday
The farmers and the sick technician arrived at 8 o’clock. Later that morning, another
technician arrived to take over the work of his sick colleague.
Key activities:
• Flattening of the soil
• Digging of holes for the poles of the crop support structure and the greenhouse frame.
• Placing the poles in the holes and filling them with cement.
• Mounting of the gutters
In the afternoon we had a meeting with Dr. Andika, Mr. Achuti, Jacob, Samuel the
Hortipro technician and Patrick, the new technician. Andika had a location for the water
tanks in mind and ordered Patrick to find a way to change the direction of the gutters.
Because of Mr. Andika’s position, Patrick was willing to find a solution: he could reduce
the length of the poles a bit on one side so the slope would be changed.
Afterwards, we were given some insights on the Kenyan way of working by Jacob. When
someone gets involved in a project they are responsible for it. Your superiors will hold
you responsible for any mistake you make. So you let people do their jobs without asking
questions.
Day 3: Wednesday
Our progress was clearly visible after the foundation was finished. Wednesday was the
day to put all the pieces together.
Key activities:
• Mounting the greenhouse frame and crop support structure.
• Digging a ditch for the cladding
• Cladding
• Ploughing the soil
Overall, Wednesday went well. Problems of the previous days were resolved and the
farmers worked hard. However,one thing proved to be very difficult, namely borrowing
a ladder. Yes, this seems simple enough, but the example shows that things can be very
complicated at the University.
The ladder that was available on the construction site broke due to poor maintenance.
At the Estates Department, we were told we need a letter of approval by Dr. Andika to
borrow another ladder. This would take at least a day. However, because the ladder was
needed right away, the head of the Department could allow it for this time. We were
redirected several times and after an hour or so, a ladder arrived. Unfortunately, this
was not the right type of ladder. After making many calls, talking to many people and
waiting all day, the ladder finally arrived when the work was already finished.
Day 4: Thursday
As the pope arrived in Kenya this day, the president had announced a national holiday.
Two farmers chose to take the day off, leaving us with six farmers to finish the job.
Key activities:
• Installing the roof cover. Putting the cover over is a simple, quick process but the
spanning of the plastic is hard, precise work.
• Digging holes for the foundation of the water tanks.
• Filling the holes with cement for the foundation.
• Installing the raised stand for the smaller water tanks.
• Preparing the beds.
It was past 6 p.m. when these activities were finished. Everybody was tired and because
the technician from the University was not around, we were unable to test the irrigation
system.
Day 5: Friday
Key activities:
• Spreading the manure
• Testing the drip irrigation system
With these activities the construction was completed. This was celebrated with soda’s
and laughter.
Day 6: Monday
Over the weekend, the tomato plants were seeded. The only thing remaining was the
installation of the water harvesting system. The gutters were connected to the water
tanks and the first flush system was installed.
