We built two DIY Wood Gas Stoves, which Jan Kluiver designed, ourselves during a EWB workshop a week before our departure to Morocco. Unfortunately, the Wood Gas Stoves did not work as hoped. The fire did not reach a sufficient temperature to cook with and different fuels produced a lot of smoke. To reduce smoke from wood fires is what the Fortune Cooker was designed for and we therefore chose not to use the Wood Gas Stove in our second prototype. In Technical Tests, weelaborate further on the tests we performed with the Wood Gas Stove.
The design
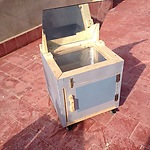
The design of the second prototype is quite similar to the first and mainly adapted to the use of the Wood Gas Stove. The fan of the Wood Gas Stove sucks fresh air into the fire. A tunnel was designed to place over de fan towards the back of the Fortune Cooker. The length of the tunnel needed to be at least 12 cm, because the fire of the Wood Gas Stove needed to be in the middle of the Fortune Cooker to fit a pan onto it and the tunnel also goes through the insulation at the backside of the box. The tunnel, made of wood, would be covered with aluminium to resist higher temperatures. The tunnel, which was already produced, had to be discarded once we discovered the Wood Gas Stove did not work.
The box
The height of the second prototype was shortened, as the first prototype had a lot of spare space above the pan. By that the sun reaches the pan more directly and does the box contain less air that needs be warmed. Other dimensions remained similar to the first prototype.
The cupboard door
The drawer of the first prototype was replaced by a cupboard door for several reasons. The drawer of the first prototype could not be opened far enough to fit a pan easily onto the gas burner. Use of the drawer learned that the pan and gas burned tend to move when the drawer was opened of closed firmly. The production of the drawer took a lot of time and the size of the gliders were not sufficient. A search of production of gliders that do not have a conventional size would take even more time. Lastly, user research with the cupboard door next to the drawer could point out user preferences.
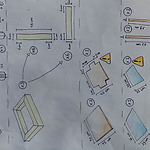
The biggest challenge of the cupboard door was to provide sufficient isolation. The design is a combination of manufacturability and good insulation. The two vertical beams in the front of the frame need to have a cove where the door can fall in the frame. The door is produced of laths to fit the cove. The more accurate the fit is, the more airtight the box will be. The back and front of the construction of laths was covered with aluminium sheets. The space between both sheets was filled with sawdust as an insulating material. Lastly a small lath was made to fit exactly between the opening through which the sawdust entered the cupboard door. The cupboard door opens by the use of two simple hinges.
The mirror
The mirror was designed similar to prototype 1, because it was simple to produce.
Details
A handle was placed onto the cupboard door and the door could be locked with a bolt lock.
Two handles were attached to the sides of the Fortune Cooker as we experienced it was difficult to lift the product. The handles are attached to the horizontal square underneath the glass. The handles needed to be placed horizontally for lifting and are attached to the main frame as this is stronger. The main frame is stronger, because the upper horizontal square merely holds the glass and mirror in place.
As the gas burner was placed towards the front of the Fortune Cooker this time, the hole for the hose was made through the insulation of the left side of the product.
Again wheels were placed underneath the frame.
Building experiences
The experiences of building the first prototype made it much easier to build the second one. Still we underwent the struggles of askew Moroccan dimensioning, which resulted in less airtightness due to cracks. Even so, the larger screws would not go in the wood completely, which forced us to use smaller screws, and make the frame less stable. Lastly the coves in the vertical beams were a big challenge as both our experience with and the capabilities of the jigsaw were far from advantageous. Appendix 6 contains a full description of the building process and our remarks.


